Amber Resin Jewellery MakingHow do you make a faux amber necklace? |
||
|
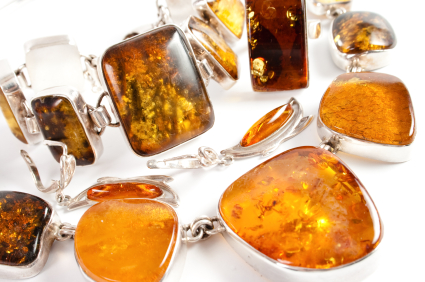
Resin
jewellery making is fun. For months I
tried to replicate faux amber jewellery and found my greatest
difficulty was in
matching the colour. Because that is the secret you must get the colour
right
to make it difficult to detect from the genuine article.
My
wife is good at mixing colour but I must
confess I find it very difficult. So it was with great relief that I
came
across a product that provided a perfect colour match to natural amber.
Called
Castin’Craft Amber transparent Dye that is a premixed natural amber
liquid
colour that can be used to make the most common honey colour found in
amber
resin. It is easy to modify this dye to darken or lighten and add other
tones to
provide the full range of colours for your resin jewellery making found in nature. Amber
is actually a fossilized resin formed
over millennia from ancient trees similar to our modern pines and
spruce trees.
A great part of the beauty of natural amber is that organic matter such
as insects,
plants and other foreign material has been trapped in the resin.
Due to the irregular shape of natural amber this is a good time to use silicone putty as the mould material to make an amber necklace.Use some DAS air drying clay or Kato polymer clay to make some irregular shaped nugget like beads at the size you require.
5) Mix
15ml of Part A with 15ml of Part B Crystal Craft add a few drops of
Castin’Craft
Amber Dye and pour into the prepared silicone bead moulds.
6)
Any air bubbles that come to the top may be
removed by waving a heat gun or hair drier gently over the top of the
moulds.
7)
Leave overnight for the resin to cure
thoroughly and then remove the cast beads from the moulds. Gently flex
the
moulds and the beads will pop out.
8) Clean off any rough edges with a
piece of wet
and dry sandpaper. Buff gently with some Johnson’s floor wax polish to
give the
beads a nice gloss.
9) Drill a hole through the beads so that they can be strung using beading wire. To add variety you should experiment and add inclusions and additional tonal colour variations to the resin. As this is fascinating in itself we will look around, for what we can find and provide an additional article on amber resin jewellery making later this year.
|
||
| By Stan Alderson © Copyright 2010 Aldax Enterprises Pty Ltd www.aldax.com.au |