Embedding with Clear Casting Polyester Resin
Article
Contents: |
|||||||||||||||||||||
|
|||||||||||||||||||||
There are many choices of resin on the market each with their own specific purpose and quality. There are however several main general purpose resins that come in either a transparent or opaque finish. In this article we are going to look at the clear types of casting resin. These are great for resin jewellery and embedding applications and are the best resins to be coloured as there is no opaque base colour to interfere with our colouring dyes. Polyester Resin: The clear resin we use in our factory every day is the same type commonly used for embedding or casting objects. It is a water clear liquid Clear Casting Polyester Resin capable of setting rock hard when a catalyst is added. Clear casting polyester resin is one of the cheapest clear casting resins by far and its use is extremely versatile. Dyes and colours may be added to the clear casting polyester resin as well as glitter, pearl essence, crushed glass, rock, marble dust and many other additives which can be blended into the resin before it is poured for interesting effects. This will be discussed in detail later in the article. Polyurethane Resin: Other types of clear casting resin include polyurethane and epoxy varieties. Recently a polyurethane resin with remarkable properties has been developed called Crystal Cast Water Clear. It can be used for everything except embedding where the water clear properties of clear casting polyester resin are required. The clarity of polyester resin is still the best of all three types. The polyurethane resin sets up in 3 minutes and can be demoulded in 10 minutes. It does not have the objectionable odour of polyester but can be coloured and filled with all the materials used with polyester resin. |
|||||||||||||||||||||
|
|||||||||||||||||||||
|
|||||||||||||||||||||
2) Ready-Made Resin MouldsThe
quickest and easiest way to cast resin jewellery and embedding
items is to use one of the many new ready-made casting resin
moulds that we have just got in stock. These moulds come in
many shapes and sizes and can be cast immediately and last for
a long time producing high quality glossy clear castings.
|
|||||||||||||||||||||
3) Make your own resin mouldsThere may be a special shape or unique design that you just can't find in our range of ready-made moulds that you wish to cast in clear casting resin. The only other option you have is to get a custom mould made by us or to make one yourself. Send us an email with your design and we can discuss the possibility of a custom mould. Click Here to email us. You can
make your own moulds out of metal, glass or heavy duty plastic,
using things you have around the home. Providing the top of
the mould is wider than the base and has straight sides to ensure
easy removal, any item around the house can be used. Never use
plastic that is too thin such as margarine containers, as this
type of plastic dissolves or melts when clear casting polyester
resin is poured into it. Moulds must have a smooth glossy surface
to give casts with a polished finish. If you
wish to create figurines or objects with undercuts that would
prevent you from releasing them from a plastic mould due to
rigid nature of the plastic, you can make your own latex or
silicone moulds that function perfectly.
4) Colouring resins and effects There are many ways to add colour and effects to clear casting resin. You can add opaque dyes to the resin to create a solid plastic looking cast. There are a great number of opaque colours to choose from. You can find our range of opaque dyes here. If you are looking for a transparent colour such as that of a stained glass window you will need to use a transparent dye. We have a large range of these dyes and they are very easy to use. Just add a few drops to your resin mixture before pouring into the mould. These dyes are very popular with resin jewellery creators as they can replicate many effects of real stone and natural amber. We have a full article on how to create faux amber resin jewellery. Click here for this article. You can also find our full range of transparent dyes here. You can use transparent or opaque dyes to create very interesting effects with multi layering. MULTI
COLOUR POURS. If you
are using a multi section mould, multi colour pours are possible
by covering any section of the mould you wish to isolate by
covering with masking tape, until you are ready to pour that
particular section. When resin poured into an isolated section
has reached the “gel stage” remove the tape and
pour the next section, until all separate sections are poured
and gelled, then fill the mould to the surface with the final
pour. Comprehensive directions follow: 1) Ensure
the mould is on a level surface- to ensure that the resin will
cure in a level position. 2)
Add transparent dye to the clear casting polyester resin, adding
a drop at a time till you have the desired colour. Mix the dye
with the resin till the colour is even. Add 5 to 6 drops of
catalyst per 30ml of resin and stir for at least one minute.
This first pour should be about 6mm thick. Allow this pour to
gel but still be “tacky” before placing embedments
in the mould or simply making the next pour. 3)
For the second pour mix the resin with drops of transparent
dye till the desired colour is obtained. Stir thoroughly then
add 4 to 5 drops of catalyst per 30ml of resin and again stir
thoroughly. Pour into the mould, filling to the top of the mould.
If desired a third pour of a different colour may be made to
fill the mould. Use only 3 to 4 drops of catalyst per 30 ml
of resin in any third pour. 4)
After the surface of the mould is hard it is time to remove
the casting when you see it breaking away from the sides of
the mould. Do not leave the casting in the mould beyond this
time. It is easy to remove the casting by gently flexing the
plastic mould away from the casting onto a sheet of mylar. Metal effects and fillers: Dyes and pigments are not the only additives you can add to clear casting resin. There are many other additives such as glowing powder to create glow in the dark effects, metal powders to create cold cast metal parts and much more. Check our tech tip articles section on our website for articles on how to cold cast.
5) Make money with your castings Clear Casting Resin has been the starting point for many interesting business ventures. Many of our customers have been using moulds for years to make frig magnets, resin jewellery and other items which they sell through their own websites, special crafty websites, ebay and at weekend markets and fairs. We have set up a section on our website called customer projects where we showcase a few of our really talented customers. You can view this section here. We have also set up a new section on our forum where you can discuss your ideas and get some help in making them real. Visit our forum here. Feel free to email or call us to discuss your ideas if you wish to talk to someone directly. Here are a few of our customers wonderful items created with clear casting resin.
|
|||||||||||||||||||||
|
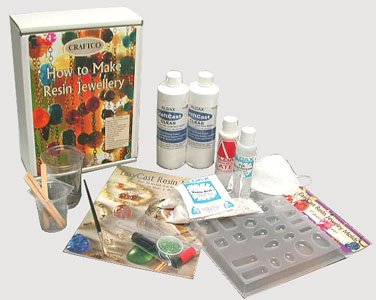
We have a growing number of kits to help you get started with mould making and casting. In particular we have a Resin Casting and embedding kit, a Resin Jewellery kit and a Resin Bangle kit ready to get you started with everything you need.
|
|||||||||||||||||||||

 Resin
Jewellery
Resin
Jewellery